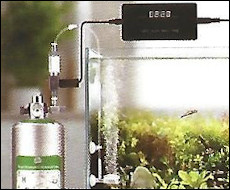
Hygger CO2 Generator Manual
HCO31 2L Capacity
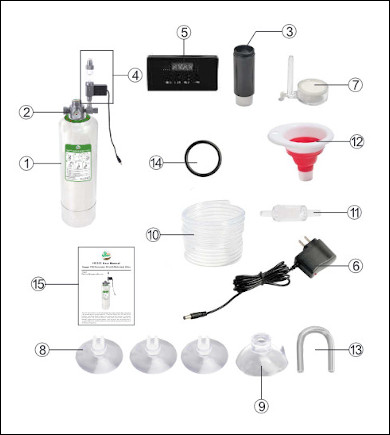
Parts List
- 01) 1x Stainless steel air cylinder - 2L capacity
- 02) 1x Valve
- 03) 1x Filter
- 04) 1x Motorized valve body with bubble counter
- 05) 1x Timer
- 06) 1x Electrical adapter
- 07) 1x Atomizer/diffuser
- 08) 3x Snap-on suction cups
- 09) 1x Flush mount suction cup
- 10) 1x Air tube
- 11) 1x Check valve
- 12) 1x Silicone collapsible funnel
- 13) 1x U-bend tube
- 14) 1x Large sealing ring (spare)
- 15) 1x User manual
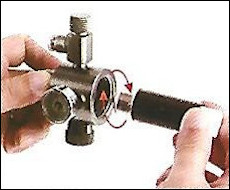
01) Attach the filter cartridge to the valve.

02) Add 200g citric acid and 200g baking soda to the cylinder.

03) Tilt the cylinder 45 degrees, then add 300ml water.
04) Quickly screw the valve onto the cylinder clockwise and tighten securely.
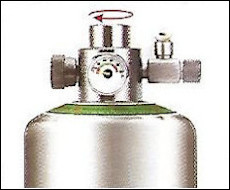
05) Turn off the knob switch to prevent gas leakage.
06) Allow 23 hours for the reaction to complete (opening it prematurely may cause valve clogging).

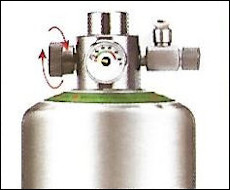
07) Fill the bubble counter 3/4 full with water, then attach the motorized valve body to the micrometering valve.
08) Cut the tube to desired length, connect the check valve, U-shaped tube, and diffuser (install check valve in direction of airflow).
09) Connect the tube to the bubble counter, and secure the diffuser inside the aquarium using suction cups.
10) Plug the connecting cables of the motorized valve and adapter into the sockets at both ends of the timer, respectively. Then, power on the adapter, open the micrometer valve and adjust the output airflow.
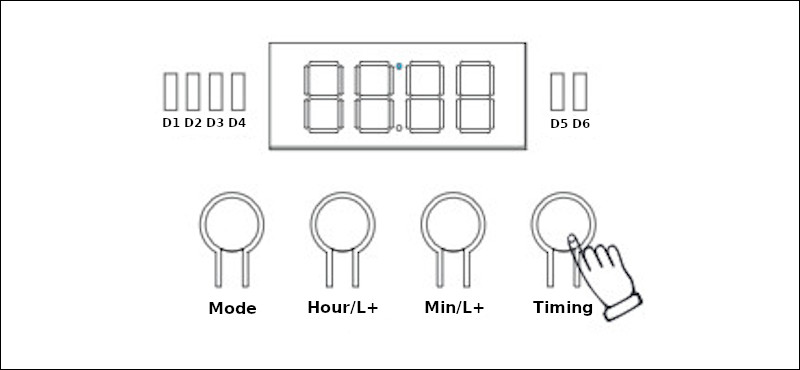
Interface Description
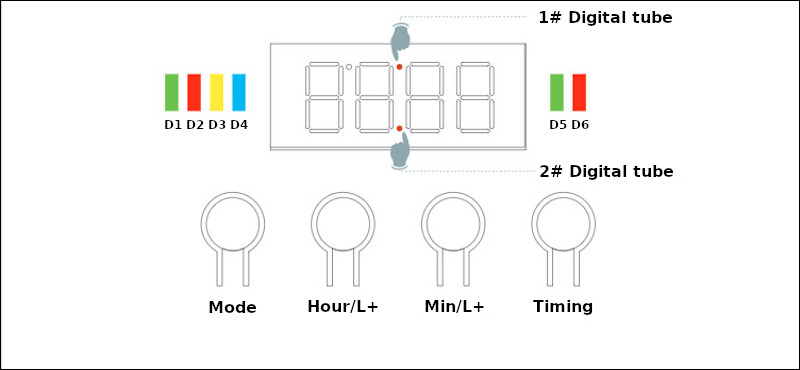
Indicator Light Description
| Light | Color | Function |
|---|---|---|
| D1 | Green | Manual mode status: The valve is opening |
| D2 | Red | Manual mode status: The valve is closed |
| D3 | Yellow | Manual mode status |
| D4 | Blue | Automatic timing mode status |
| D5 | Green | Automatic timing mode status: The valve is opening |
| D6 | Red | Automatic timing mode status: The valve is closed |
Button Description
| Button | Function |
|---|---|
| Mode | Long press to switch between manual mode and automatic mode |
| Hour/L+ | Hour+ |
| Min/L+ | Minute+ |
| Timing | Switching on/off in manual mode |
Digital Tube Description
| Digital Tube | Function |
|---|---|
| 1# Digital Tube | The 1# Digital Tube lights up, indicating the start time is set to activate |
| 2# Digital Tube | The 2# Digital Tube lights up, indicating the shut-off time is set to activate |
4 steps to set up the timer switch in automatic mode
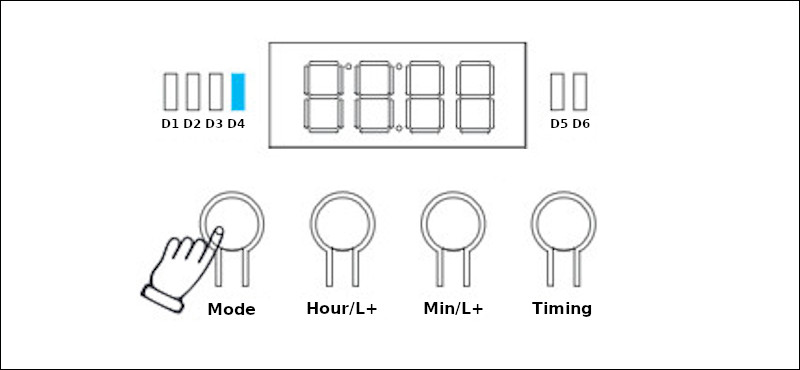
Step 1: Long press the "Mode" button. The "D4" blue light turns on, entering automatic mode.
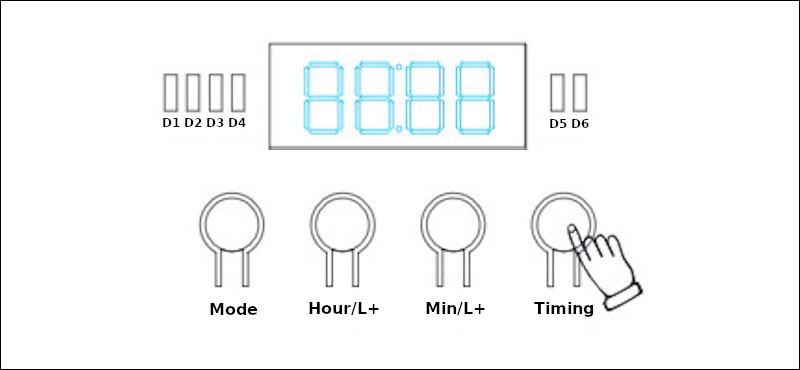
Step 2: Long press the "Timing" button. The displayed number blinks. Use the "Hour/L+" and "Min/L+" buttons to set the current time (24-hour system).
Step 3: Press the "Timing" button. The "1# digital tube" lights up. Use "Hour/L+" and "Min/L_" buttons to set the startup time.
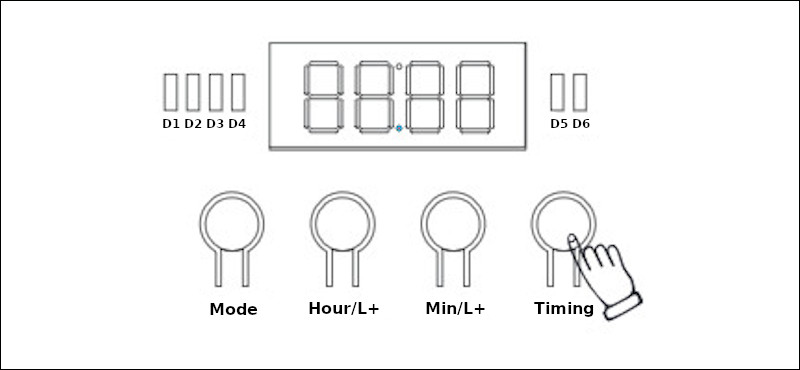
Step 4: Press the "Timing" button. The "2# digital tube" lights up. Use "Hour/L+" and "Min/L+" buttons to set the shutdown time. After completion, press "Timing" to enter operational status mode (current time displayed).